Integrate with Microsoft Entra ID
In this topic, you'll learn how to integrate LEGAL HOLD with Microsoft Entra ID. When you integrate LEGAL HOLD with Microsoft Entra ID, you can:
-
Control in Microsoft Entra ID who has access to LEGAL HOLD.
-
Manage your accounts in one central location - the Microsoft Entra ID portal.
Add LEGAL HOLD from the Gallery
|
|
Note: To configure the integration of LEGAL HOLD into Azure AD, you need to add LEGAL HOLD from the gallery to your list of managed SaaS apps. |
-
Sign in to the Microsoft Entra ID portal with an Microsoft Entra ID subscription (Application Administrator account).
-
Select the View button beneath the Manage Microsoft Entra ID tile.
-
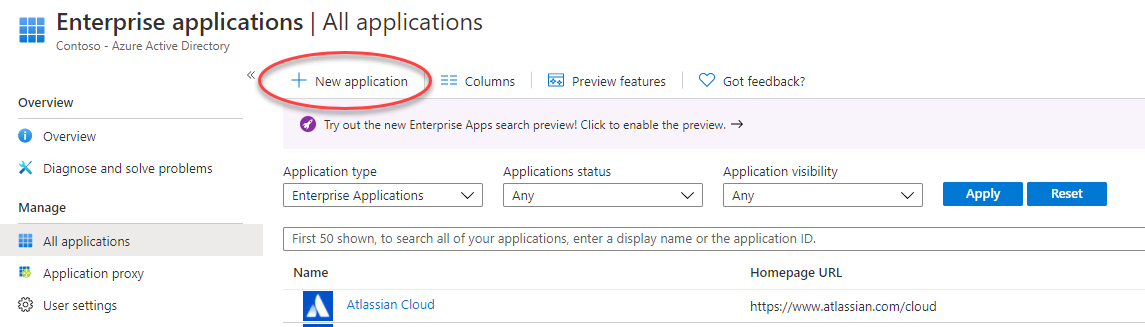
Select the Enterprise applications section.

-
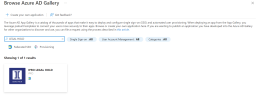
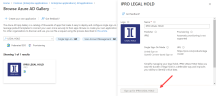
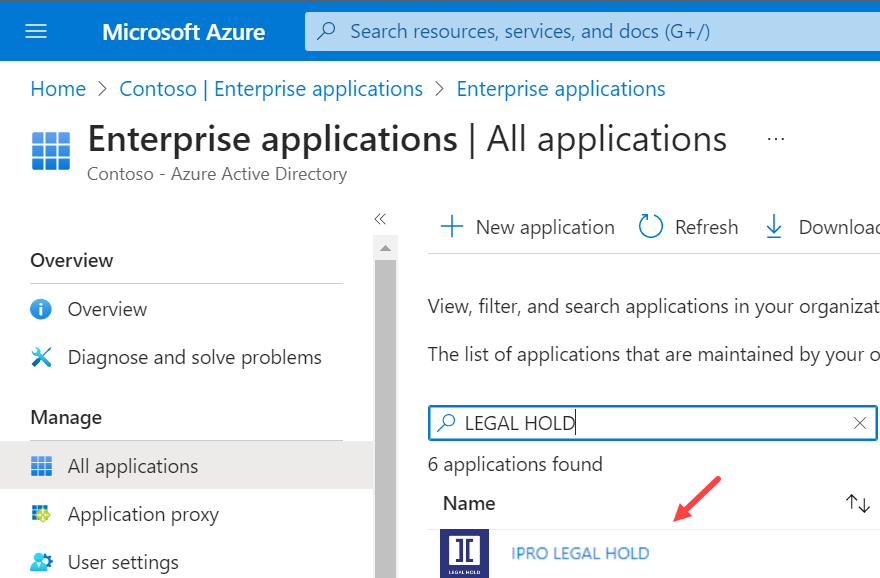
Select + New application.

-
Search for 'LEGAL HOLD' and select the LEGAL HOLD tile.
-
Select Sign up for LEGAL HOLD (bottom right corner).
-
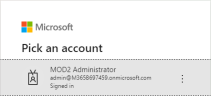
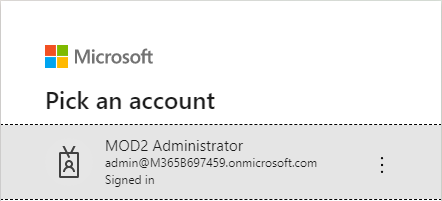
Select your Application Administrator account.
-
Select Consent on behalf of your organization (recommended) and click Accept.
With 'Consent on behalf of your organization' selected, custodians do not have to consent when logging in. It makes life easier for them.
-
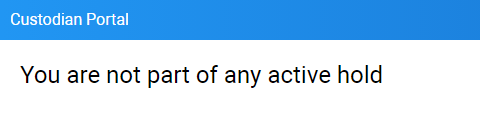
The LEGAL HOLD application is added and you will be signed in. However, since no roles have been set yet for LEGAL HOLD, you will be directed to the empty Custodian Portal.
Close this tab and continue with Step 2 below to assign roles to LEGAL HOLD.


Assign Users and Roles to LEGAL HOLD
Microsoft Entra ID uses a concept called assignments to determine which users should receive access to selected apps. Decide which users and/or groups in Microsoft Entra ID need access to LEGAL HOLD. Once decided, you can assign these users and/or groups to LEGAL HOLD by following the instructions here. The following roles can be assigned to users: System Administrator, Global Hold Manager, Global Hold Viewer , Matter Manager, Matter Viewer and Custodian.
|
|
Note I: At a minimum, assign one user (with an Microsoft Entra ID Application Administrator account) as System Administrator (to synchronize contacts) and one user as Global Hold Manager (to test sending preview emails). Note II: Custodians do not require a role in the Microsoft Entra ID portal when the "User assignment required" is set to No. This is preferred. Users without a role assigned will only have access to the Custodian portal of LEGAL HOLD when added to a hold. If you need to restrict access to the custodian portal for specific users, then you can use the custodian role assignment. |
-
Refresh the Enterprise applications section.
-
Search for

-
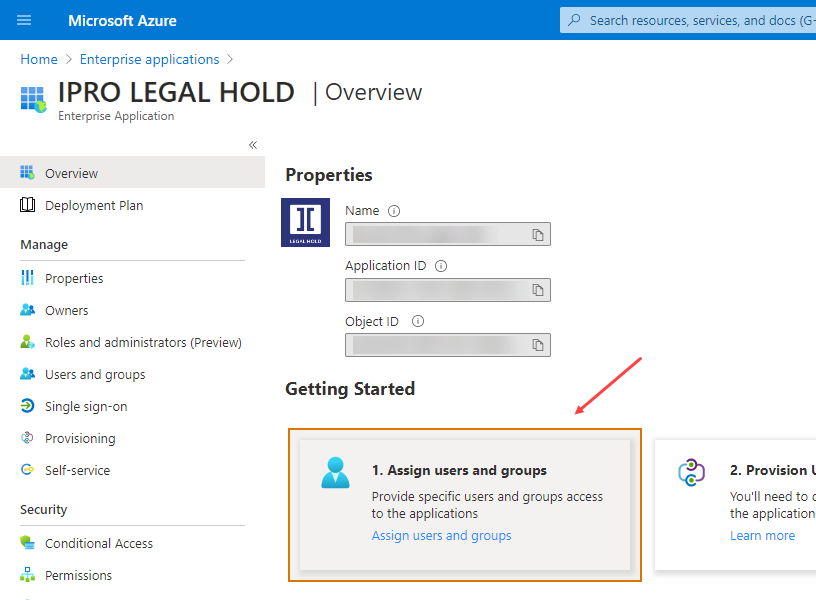
Select the 1. Assign users and groups tile.
-
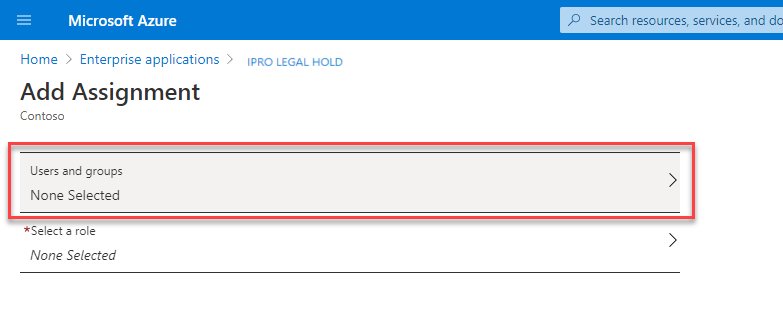
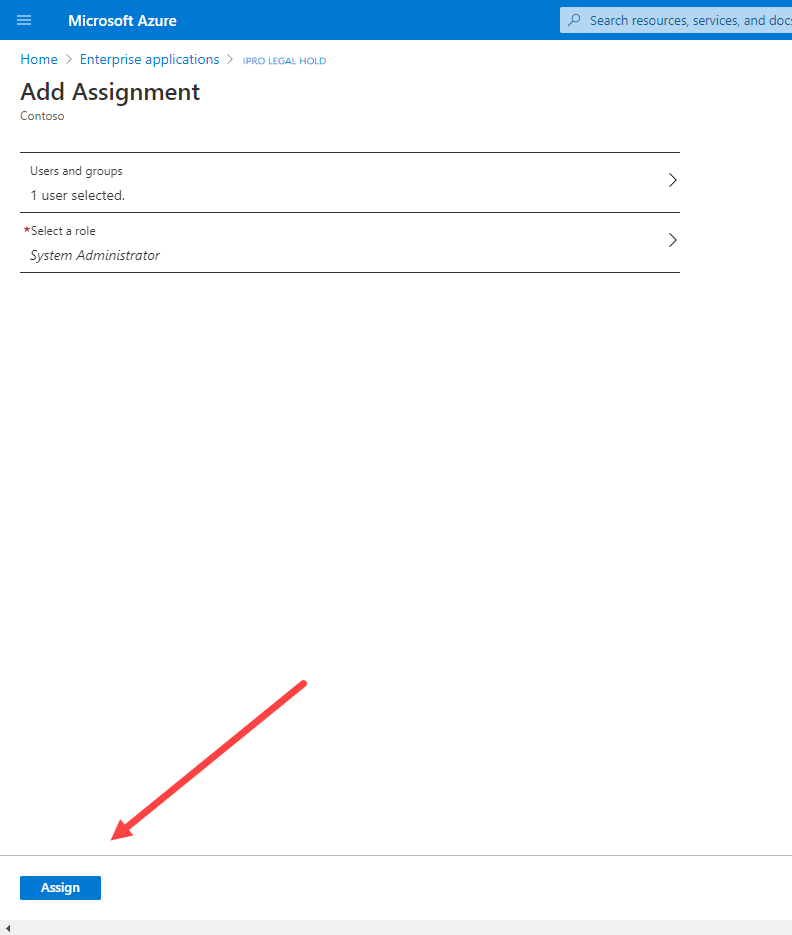
Select + Add user.
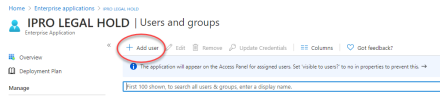
-
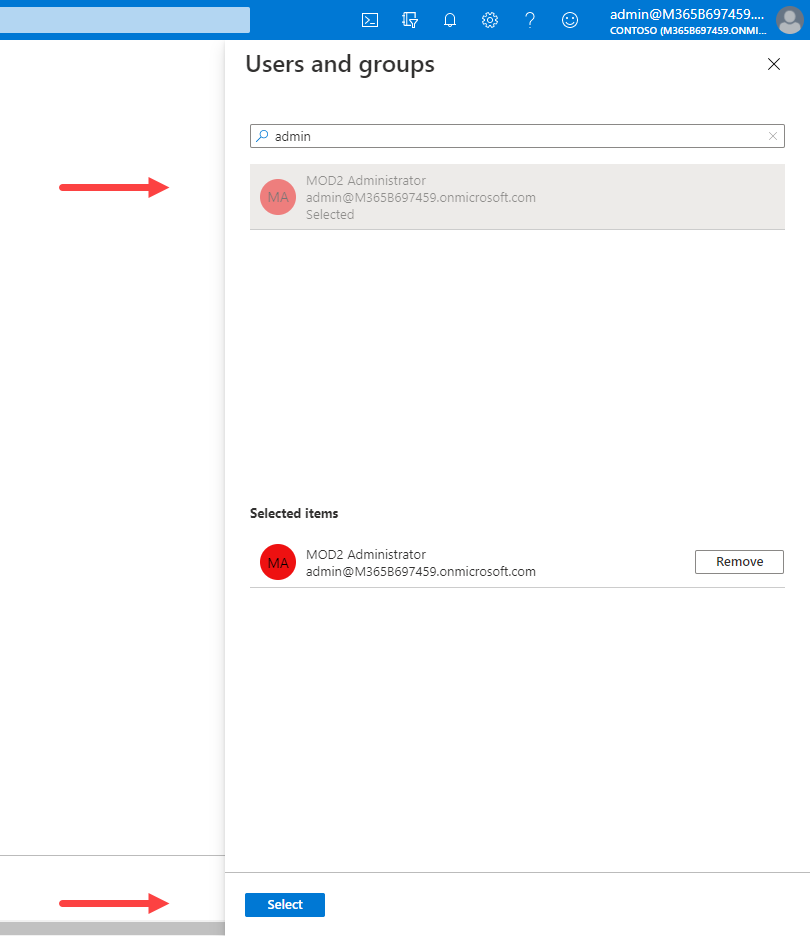
Select Users and groups.

-
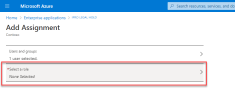
In the right pane, select a user with an Microsoft Entra ID Application Administrator account, and click Select at the bottom.

-
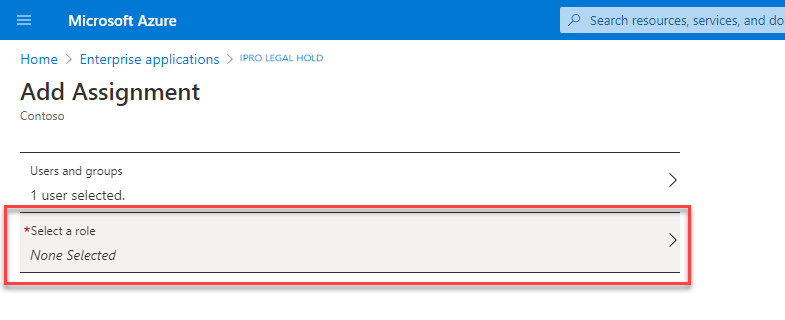
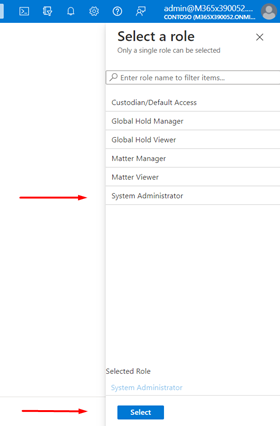
Select Select a role.
-
In the right pane, select the System Administrator role, and click Select at the bottom.

-
In the bottom left corner, select Assign.

-
Repeat step 4 to 9, but now assign a user with the Global Hold Manager Role.

Note: This user does not need to have an Microsoft Entra ID Application Administrator account.

Synchronize Contacts
In this section you'll learn how to add contacts from the Microsoft Entra ID to LEGAL HOLD.
Prerequisite: You need a user (with an Microsoft Entra ID Application Adminstrator role) with the LEGAL HOLD System Administrator role.
-
Go to https://legalhold.one (depending on previous settings, you might have another domain, like .eu)
-
Log in with the user (with an Microsoft Entra ID Application Administrator role) that has the LEGAL HOLD System Administrator role.
-
As a System Administrator you can synchronize contacts from the Microsoft Entra ID Directory.
-
-
On the Address Book page, select the Settings icon

-
Select Synchronize Contacts.
-
By synchronizing contacts, you will always work with an up-to-date list of potential custodians.
-
All users from the Microsoft Entra ID will be added. You only need to do this once. The list with users will be automatically synchronized every day.

-
-
Select the user with the LEGAL HOLD System Administrator role.
-
Select Accept.
Note: To synchronize contacts, it is not required to select 'Consent on behalf of your organization' because only Legal Hold System Administrators are able to see this option. Once contacts are synchronized, the Legal Hold system administrator does not need to follow these steps again, because the list with users will be automatically synchronized every day. Other users of Legal Hold are not allowed to synchronize contacts.
Once the contacts have been synchronized, close the tab.


|
|
Note: If a user is missing after synchronization, then the User Type might be empty or wrongly stated. It must be noted as 'Member'. For more information, please refer to User Type is Blank. |
Enable Sending Emails
In this section you'll learn how to enable LEGAL HOLD to send email messages on your behalf.
Prerequisite: You need a user with the LEGAL HOLD Global Hold Manager role. This user needs to have an Office 365 license with Exchange Online element enabled. Please check this at Home > Users > "User with IPRO LEGAL HOLD Global Hold Manager role" > Licenses.

-
Go to https://legalhold.one (Depending on previous settings, you might have another domain, like .eu).
-
Log in with the user that has the LEGAL HOLD Global Hold Manager role.
-
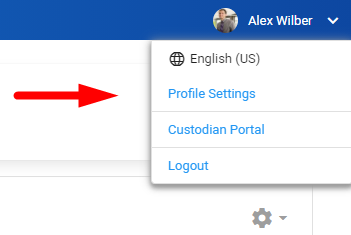
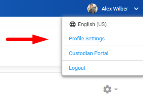
In the top right user menu, you can navigate to Profile Settings.
-
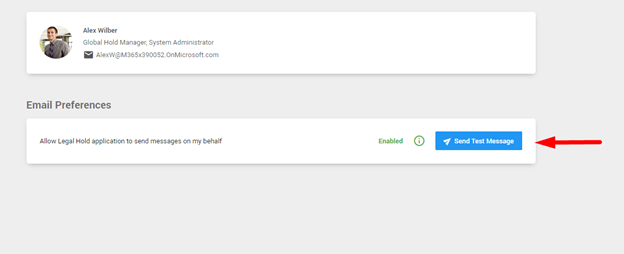
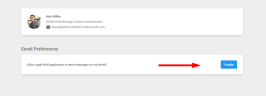
Click in the Email Preferences section on Enable, to enable email sending.
-
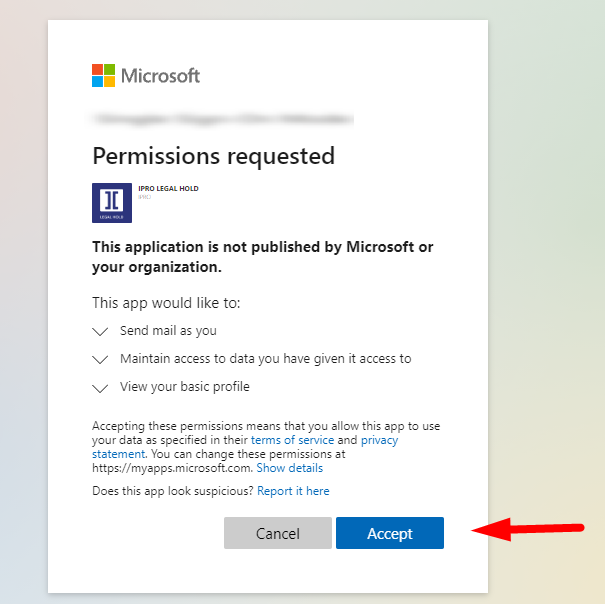
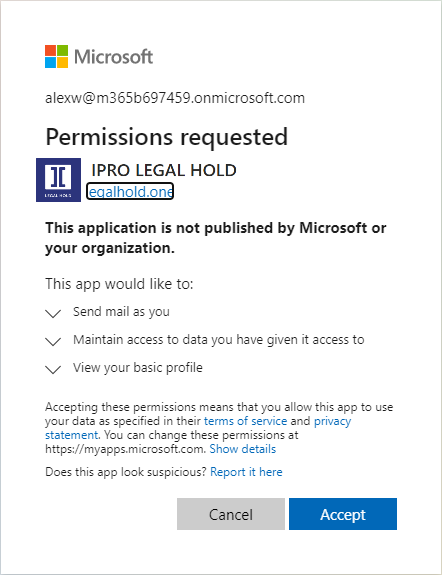
Click Accept in the Permissions Requested pop-up to allow LEGAL HOLD to send emails on your behalf.

-
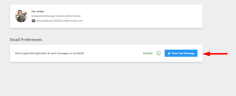
Now you can send a test message to check if LEGAL HOLD is able to send email messages. Click on Send Test Message.
-
Click Yes to send the message. Check your Inbox to see if the message has been sent.
-
Alternatively, as a Global Hold Manager, test sending emails using the email message preview option.
-
In the menu on the left, select Configuration > Message Templates.

-
Select
 .
. -
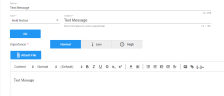
Define a Name (for example, Test Message), Type, Subject and a write a bit of content. Click Save (bottom right corner).
-
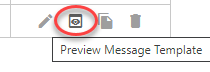
On the Message Templates page, select Preview Message Template.

-
Select
 .
. -
Select the user with the LEGAL HOLD Global Hold Manager role.
-
Select Accept.
The preview message has been sent.
You have now learned how to integrate LEGAL HOLD with Microsoft Entra ID. You have synchronized your contacts and you have sent a preview message. All users with a Global Hold Manager role can now use LEGAL HOLD and start creating legal holds. Continue with our Quick Start Videos.
-