Bulk Tagging
The Bulk Tagging feature in ZyLAB ONE allows users to uniformly
categorize large numbers of documents in order to increase review productivity.
By applying tags to a set of relevant documents, large sets of non-relevant
documents can be divided from the relevant documents.
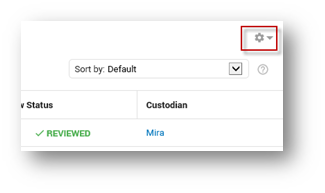
Bulk tagging can be started by choosing a set of documents, like a batch search result list, and selecting the settings icon on the right side of the screen. The List Options feature will determine which documents will be tagged. The two options are Flat List and Family Tree.
Example
This function can for instance be used in the John Doe scenario to tag all relevant documents with the 01 DSAR tag.
Candidate tag after performing a bulk search. After reviewing the documents, non-relevant documents can be easily untagged.
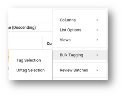
Perform bulk tagging to tag multiple documents at once. Tags are added to:
- No manually selected documents/Flat List
Action is performed on all documents in Document List, including items not visible to you on the page due to paging. - No manually selected documents/Partial or Full Family Tree
Action is performed on all items belonging to a Family, including items not present in Document List. - Manually selected documents
Action is performed only on selected documents in Document List.
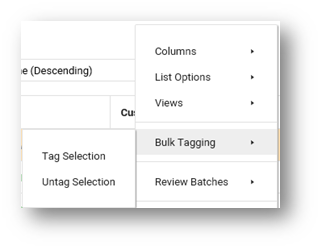
Select Bulk Tagging in the Document List via the Settings icon.
-
Depending on the selected List View (Flat List or Partial/Full Family Tree) and whether you selected documents in the Document List, you can tag or untag Documents, Families or the Selection.
-
Click or press Shift + (key specified on the tag) to select a tag.
Note: The available (sub)tags may be different for your specific use.
Examples of tags that might be available are:- Shift + F
Responsive The documents are relevant to the case - Shift + D
Not Responsive The documents are not relevant to the case
- Shift + F
- When a tag is selected, you can add other applicable tags that are defined. Tags can be added by the Administrator.
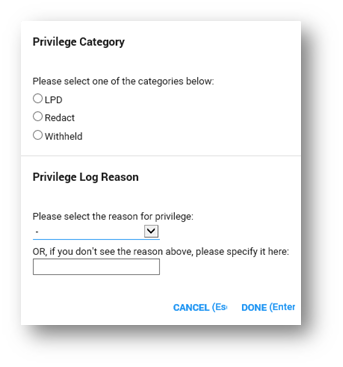
- If documents are privileged, define a privileged category and reason.

- Select a privilege category.
- Select a privilege log reason from the dropdown list box.
Privileged Categories and Privileged Log Reasons are created separately for each matter; this means you probably have a different set of categories/log reasons to choose from than the ones shown in the example above. - If you do not see the correct reason, specify one yourself.
- If you are done, click the Done button or push the Enter key.
- If you are having second thoughts, click the Cancel button or push the Escape key.
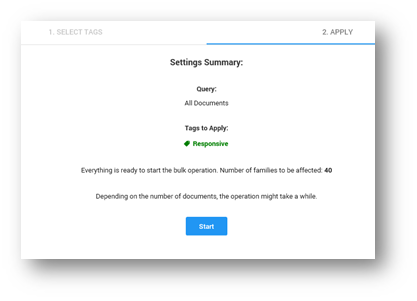
- Click Next.
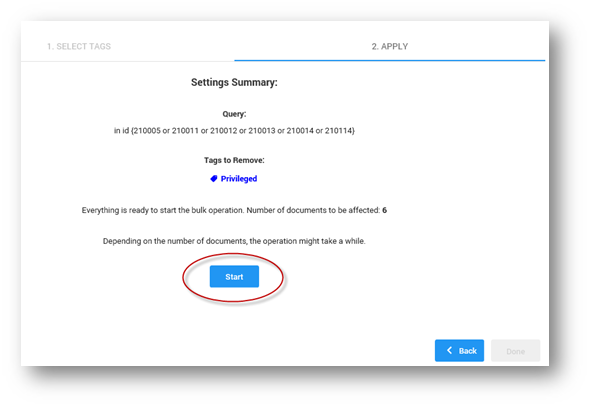
The Apply tab (step 2) will appear.
- Click Start.
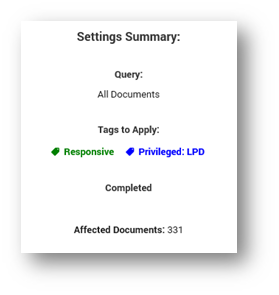
The number of Tagged Documents/Families will appear.
- Click Done.
You will return to the Document List, with all the targeted documents tagged and marked as being reviewed.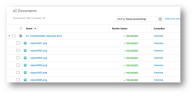
- To untag, select Bulk Tagging > Untag Families/Documents/Selection.
- In the next screen, you will see a list of all the tags applicable to the selected items.
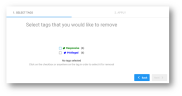
- Select one or more tags that you would like to remove. This can be Parent (for example, Responsive, Not Responsive) and/or Child tags (for example, Privileged, Confidential).
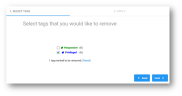
- Click Next.
- Click Start.

- Click Done.